Faculty Grade Entry Banner 9 Instructions
Banner 9 Faculty Grade Entry (FGE)
The following sections describe the step by step how to complete various tasks related to student grade entry in Banner 9’s Faculty Grade Entry (FGE). Banner is UIC’s enterprise resource planning (ERP) system, which houses all faculty/staff and student data inclusive of grading. Grading periods include MIDTERM grades and FINAL term grades.
To be able to enter grades in Banner 9, you need to be assigned in the Banner system as the instructor for that class. Each class will have a Course Record Number (CRN) for each unique lecture and a CRN for each linked section such a laboratory (if applicable). After importing/uploading grades into Banner 9, you will generate a Validation report that will guide you to correct import errors. Then you can reimport a corrected version of the spreadsheet.
In summary, the steps to enter student grades in Banner 9 are:
-
- Log in to my.uic.edu and connect to FGE via the grading portlet;
- Submit grades to Banner 9 (manually or by an import/upload);
- Validate that the grades were entered without errors;
- Generate a summary of grades submitted for that section.
Faculty Grade Entry (FGE) Banner 9: Step by Step Overview
-
- Logging into the my.uic.edu Portal -- Services for Faculty/Staff and Students
- Banner 9 Faculty Grade Entry: Dashboard Overview
- Online/Manual Grade Entry in Banner 9 FGE
- Exporting/Downloading from Banner 9 FGE a Template/Spreadsheet
- Importing/Uploading to Banner 9 the FGE Template/Spreadsheet
- Submitting Grades for Multiple CRN/Sections
- Troubleshooting: Wrong Roster and Reimporting
- Importing from Grades from Blackboard
Tables
1. Banner 9 Faculty Grade Entry: Logging into the my.uic.edu Portal -- Services for Faculty/Staff and Students. | Click on image to enlarge |
|---|---|
|
|
|  |
| 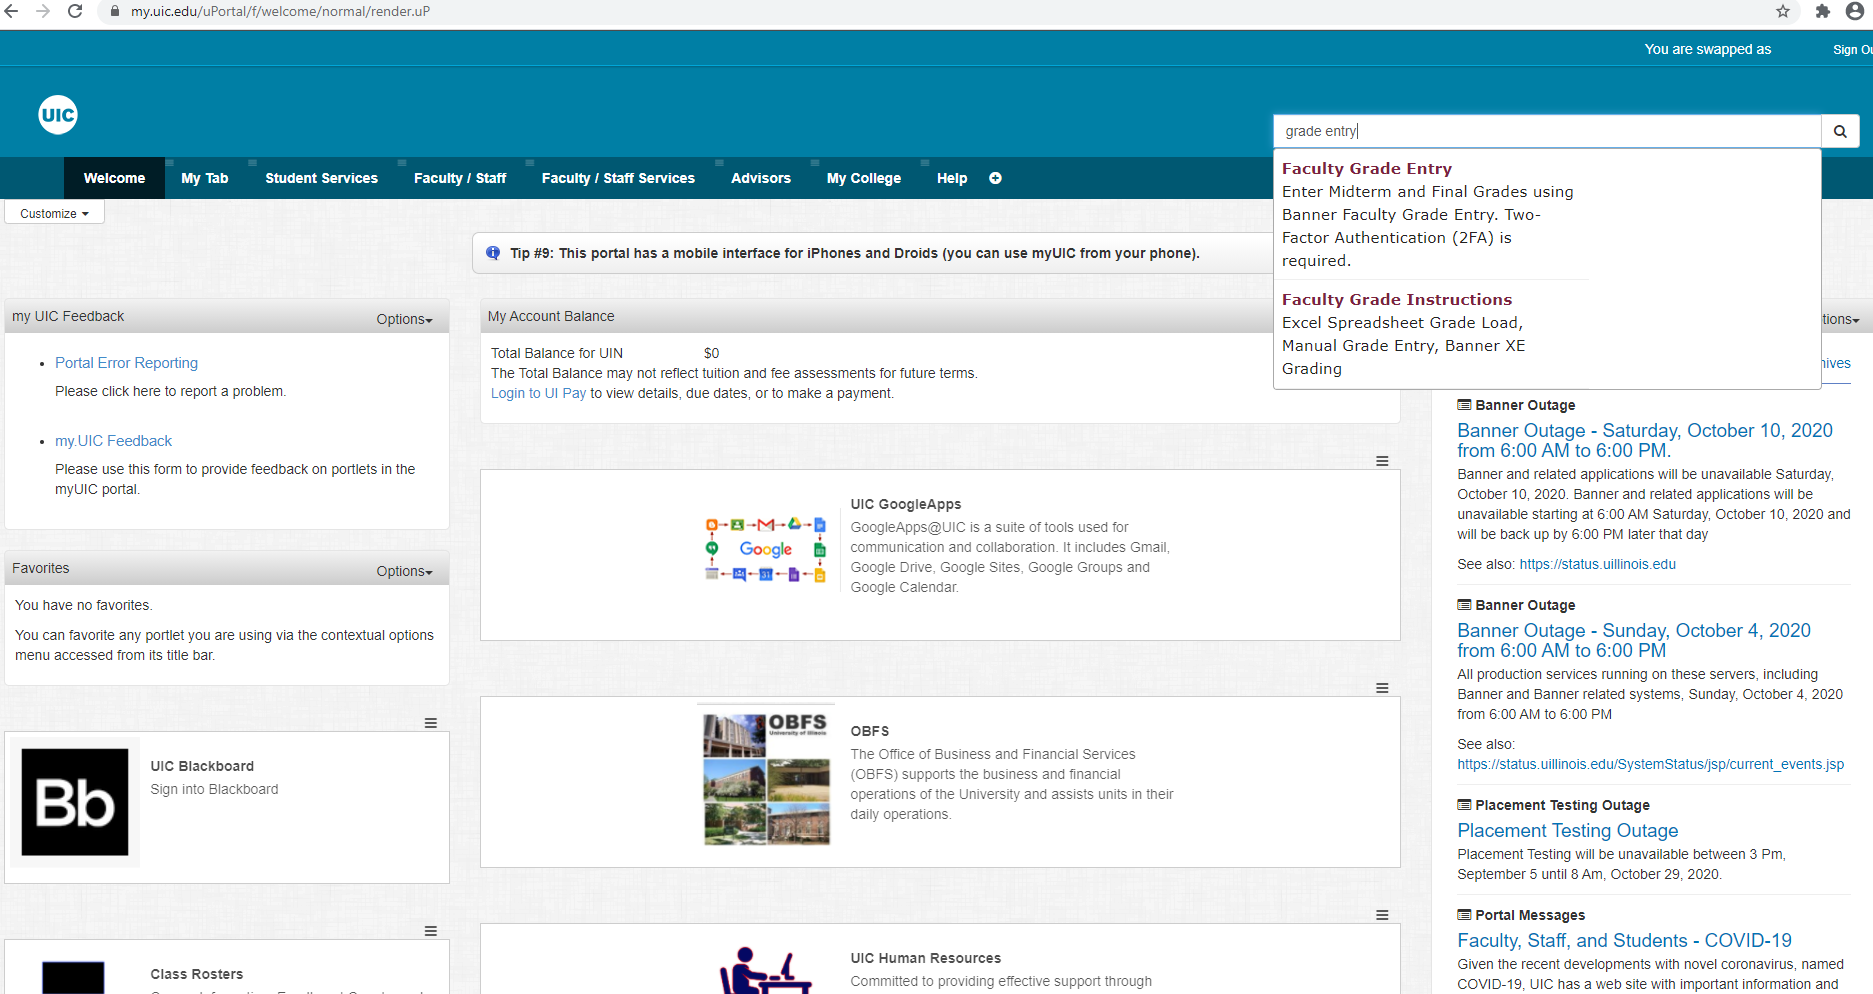 |
Alternatively, you can locate the FGE portlet on the Faculty / Staff tab. |  |
|
|
|
top of page
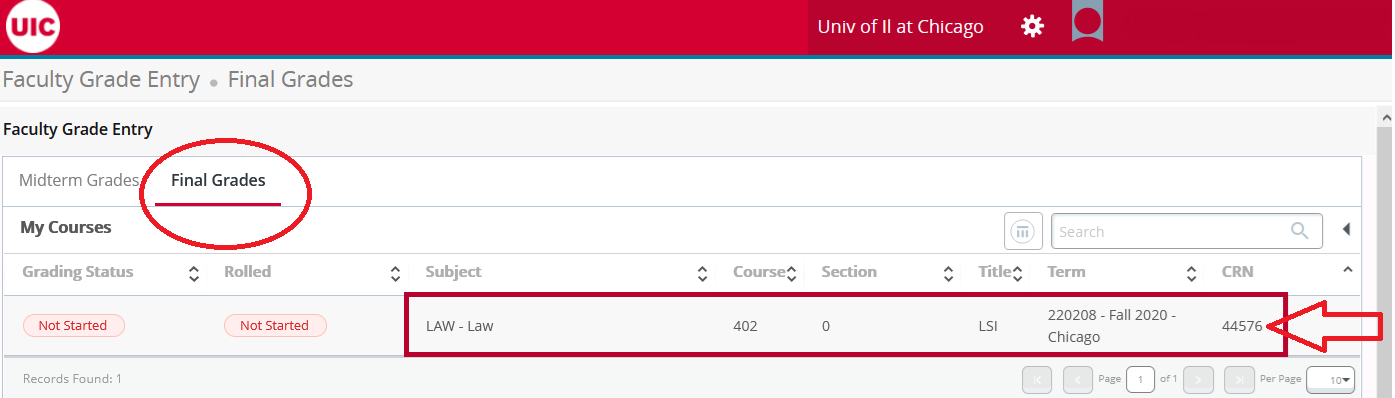
2. Banner 9 Faculty Grade Entry: Dashboard Overview | Click on image to enlarge |
|---|---|
For Banner 9 grading, click on: FACULTY GRADE ENTRY | 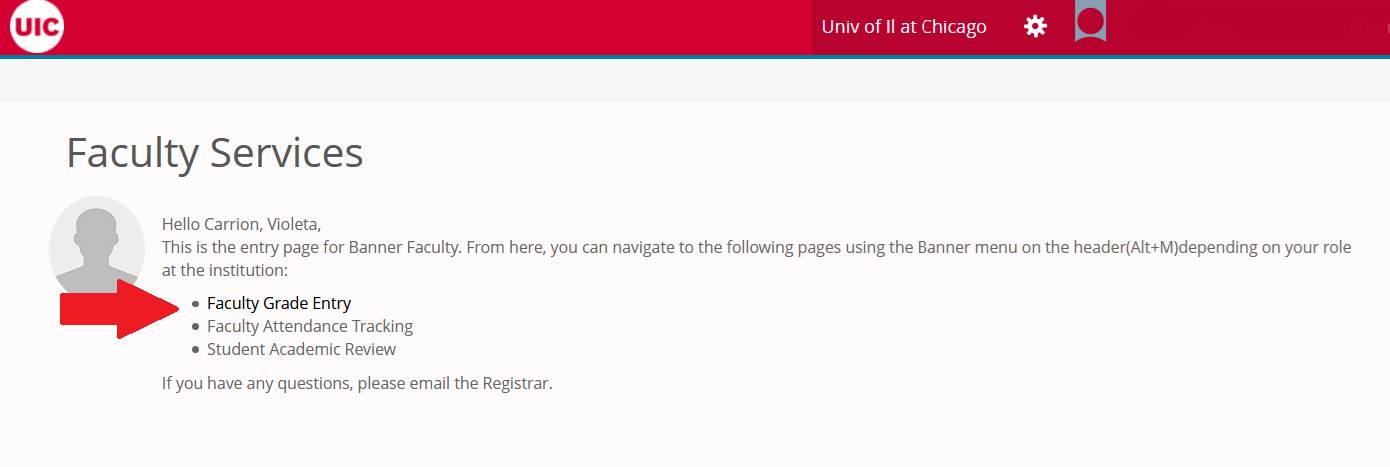 |
. |  |
 |
|
|  Note: Students names and UINs are hidden on purpose on this image. |
|  |
|  |
|  |
The left arrow (marked with a circle in the image to the right), contains a HELP submenu which has two Tabs: Course Details and Getting Started with grade Entry. | 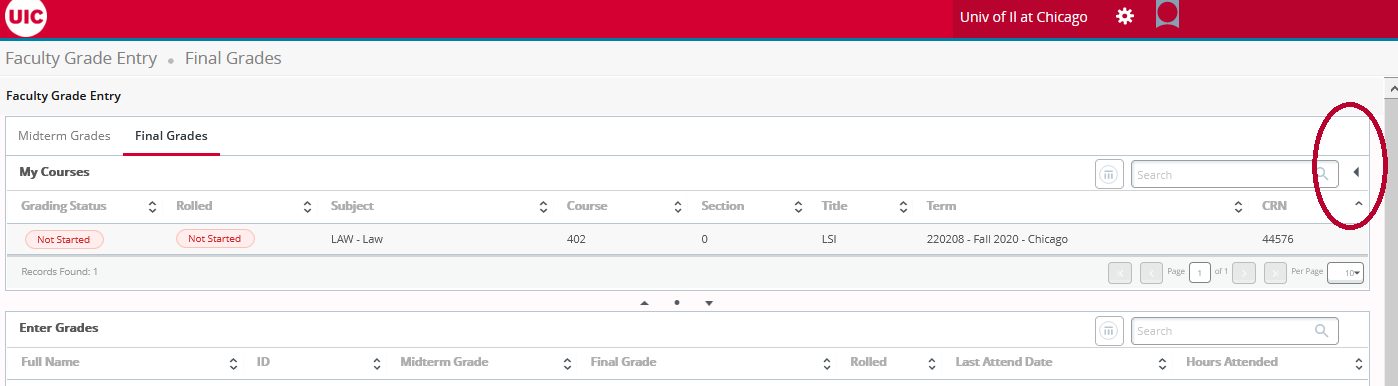 |
Or consult the Grading Manual - UIC Office of the Registrar for general grading information and interaction with University policies and procedures. | 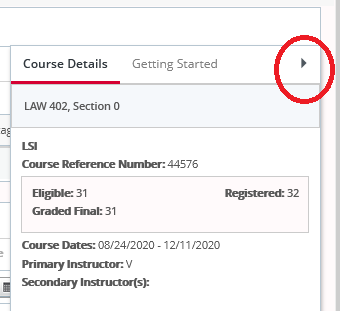 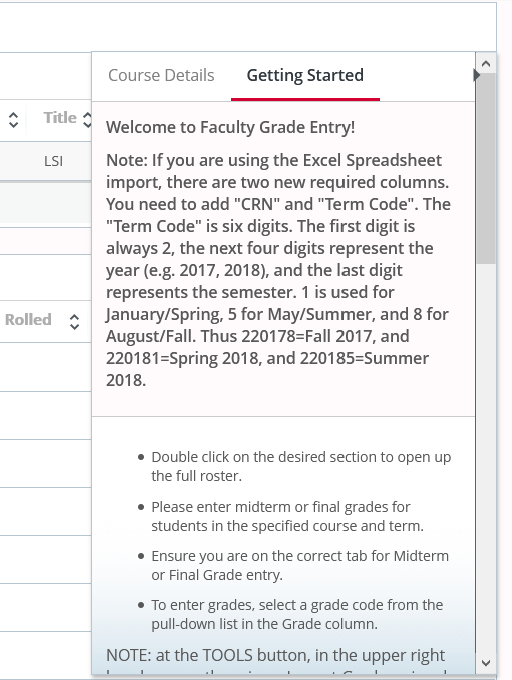 |
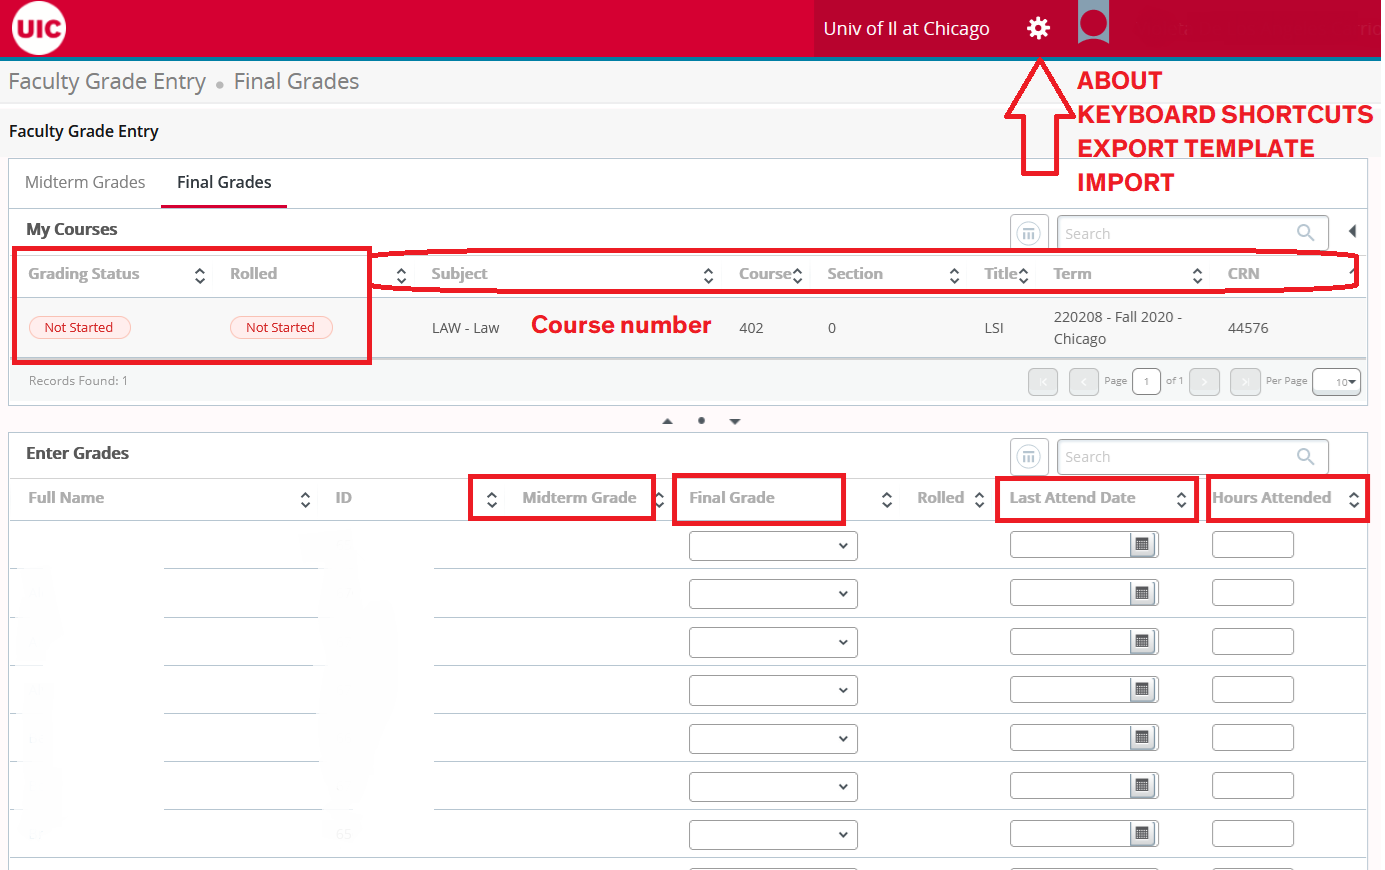
3. Online/Manual Grade Entry in Banner 9 FGE | Click on image to enlarge |
|---|---|
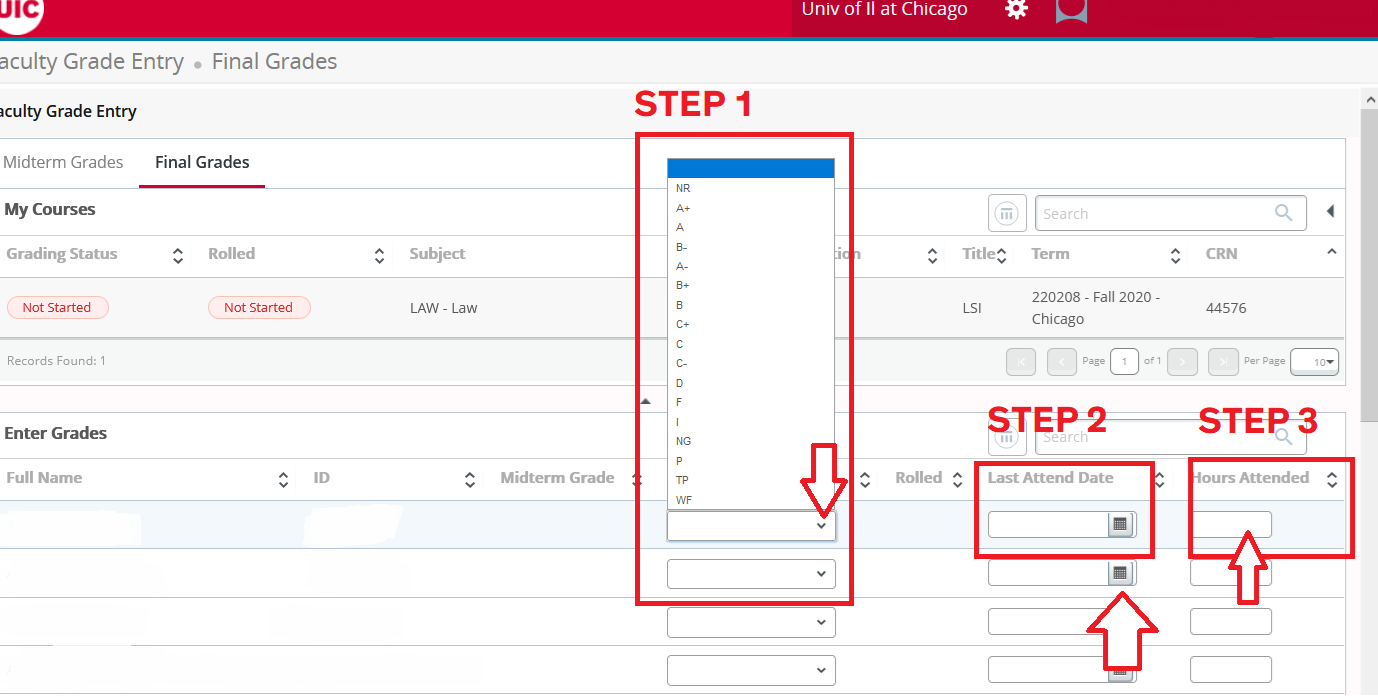
Online/Manual grade entry requires filling in data for at least three columns for each student: SEE FGE HELP or for more information consult: Grading Manual: Recording of F and U grades and use of Last Attend Date and/or Attend Hours
|  |
| 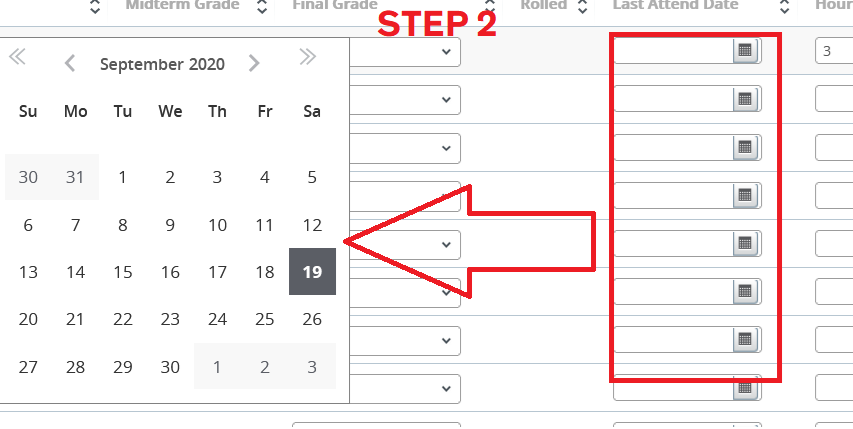 |
STEP 2: Click on the down arrow for LAST ATTENDED DATE and select the grade for the student in that row STEP 3: Click on the down arrow for HOURS ATTENDED and select the grade for the student in that row Repeat these 3 steps for all the students in your roster. | 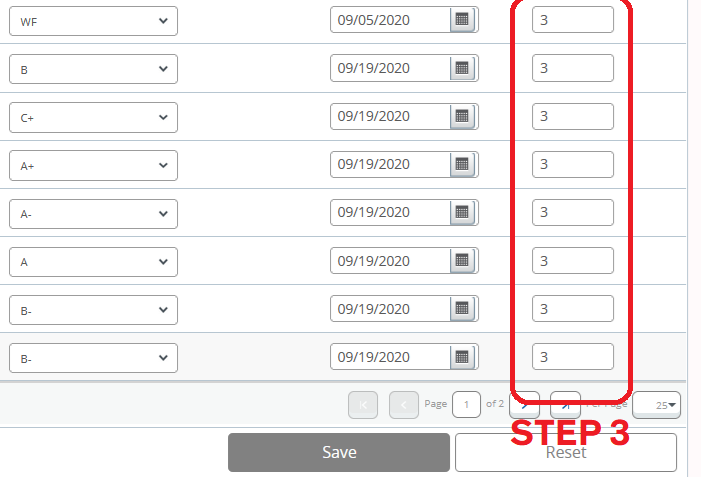 |
Click on SUBMIT or SAVE depending the case. | |
|  |
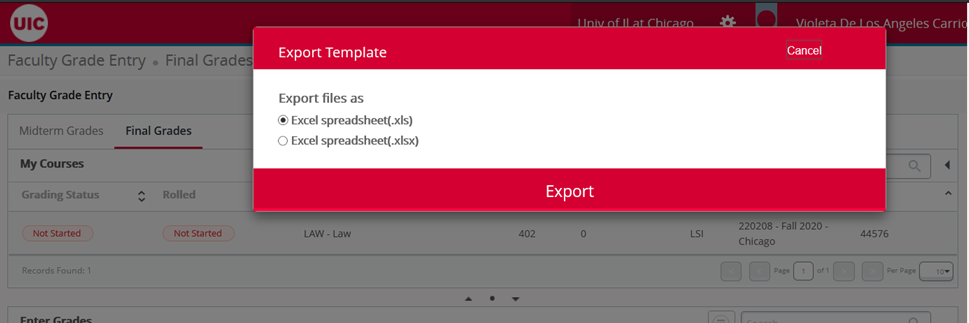
4. Exporting/Downloading from Banner 9 FGE a Template/Spreadsheet | Click on image to enlarge |
|---|---|
IF you want to use Excel to enter your grades this is the easiest way because the file you download is already configured with the columns that the Faculty Grade Entry app requires. | 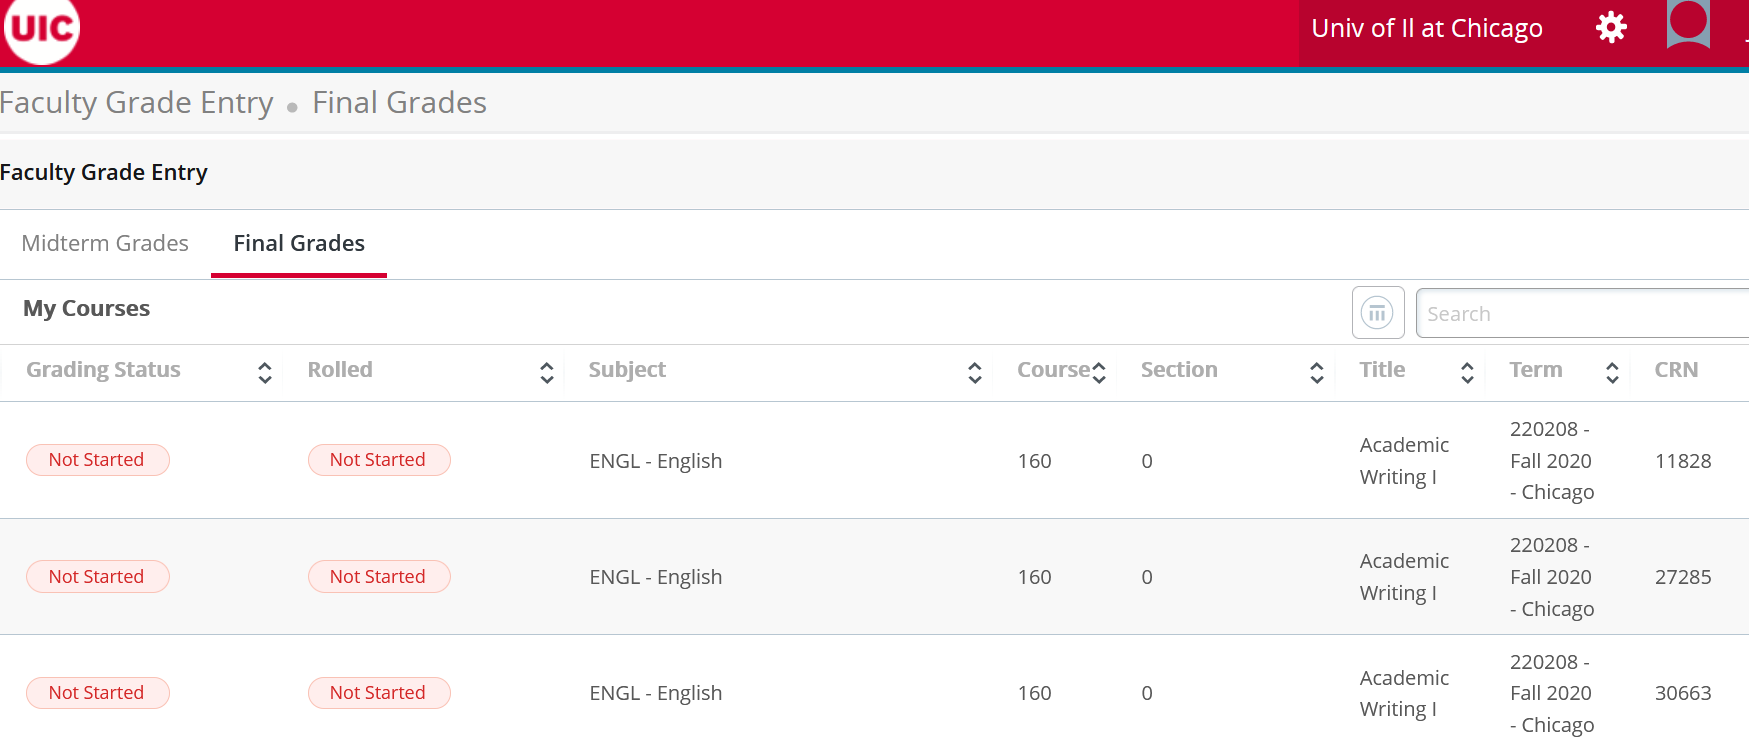 |
|  |
|  |
| |
Open the spreadsheet in Excel and enter for each student, the information under the columns: | |
SEE Faculty Grade Entry HELP for more information or consult Grading Manual | UIC Office of the Registrar: Recording of F and U grades and use of Last Attend Date and/or Attend Hours | 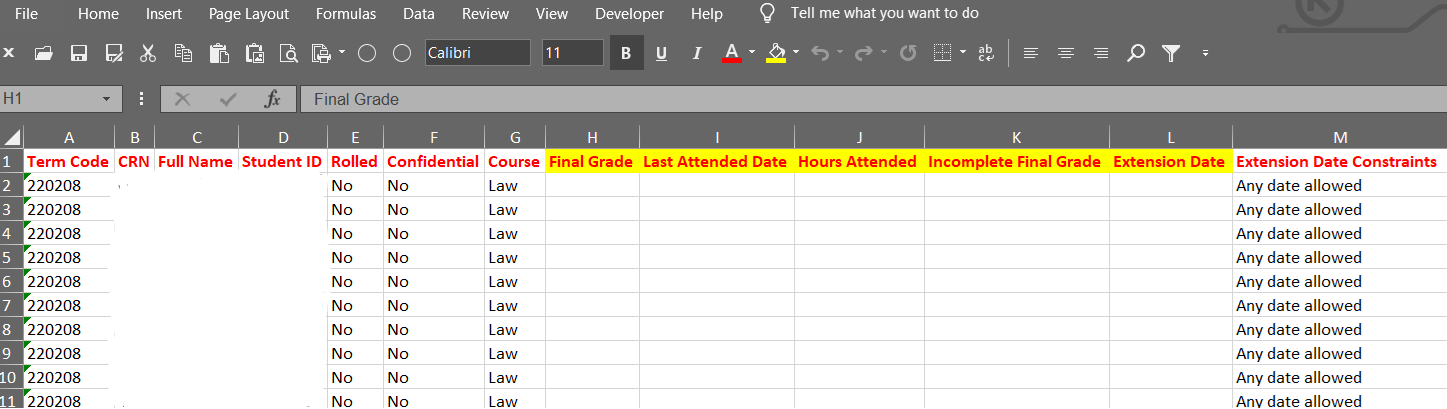 |
Click on SUBMIT or SAVE depending the case. |  |
5. Importing/Uploading to Banner 9 the FGE Template/Spreadsheet | Click on image to enlarge |
|---|---|
Click | 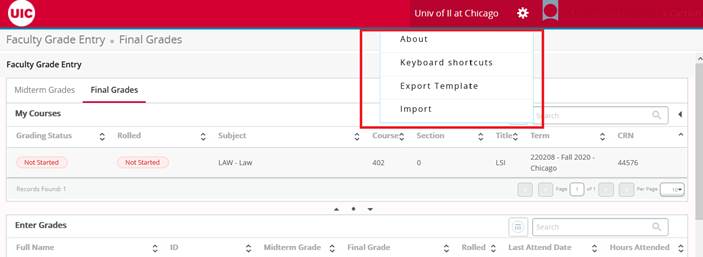 |
The Import Wizard will walk you through the 5 steps needed to import/upload a spreadsheet into Banner 9. | 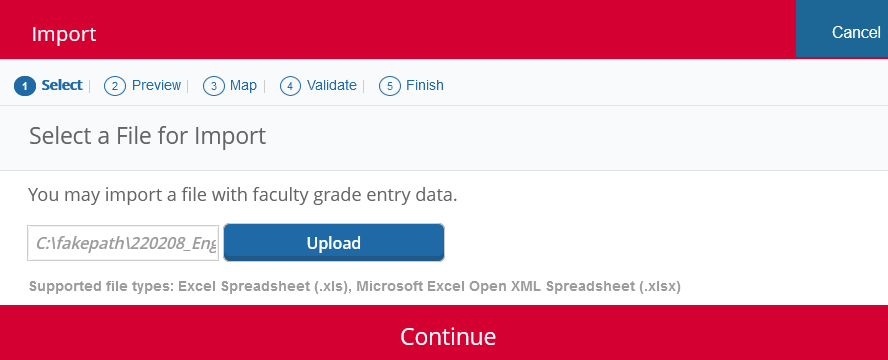 |
Step 1: Select the file to be imported.Note: Put the cursor on the left greyed-out area to trigger the OPEN FILE menu and then choose the file to be imported. | 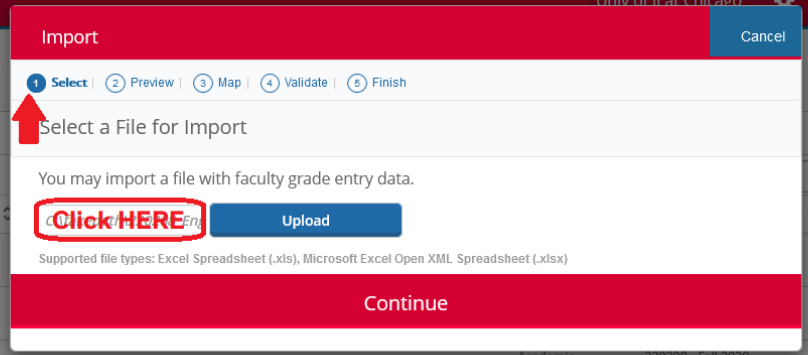 |
During the upload, you will Click CONTINUE when the upload is complete. | 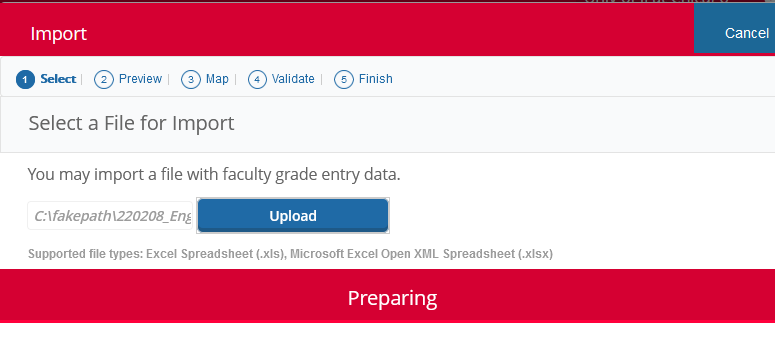 |
Step 2: Preview the upload |  |
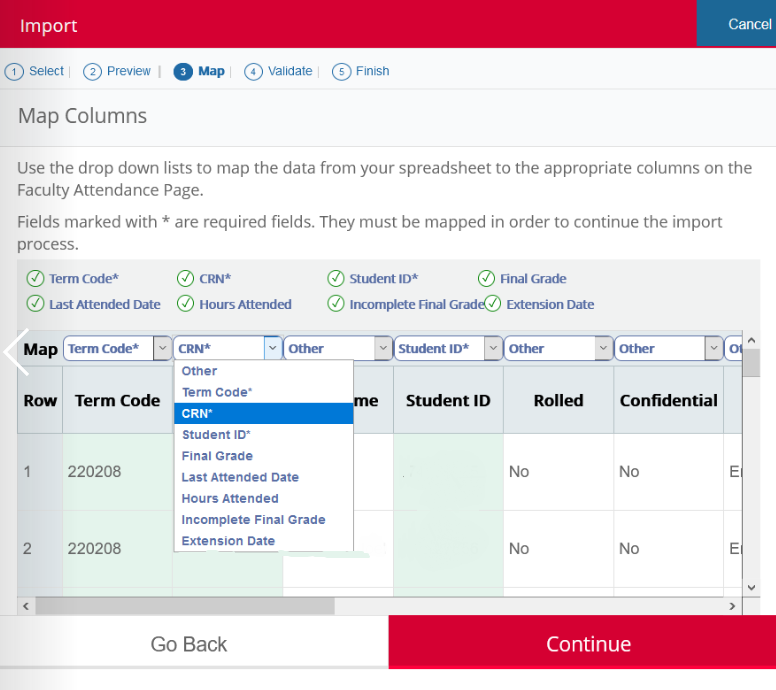
Step 3: Mapping Columns.Case 1: You used the Banner 9 FGE Template If you used the Banner 9 FGE Template, you do NOT need to map any column in this step. The FDE template/spreadsheet, has all columns correctly labelled and you do not need to do anything on this step. Case 2: You created your own spreadsheet and did NOT use the Banner 9 FGE Template. If you are importing any other spreadsheet with your student data, you MUST then map the columns on your spreadsheet to those expected by Banner 9.
Click CONTINUE when done. | 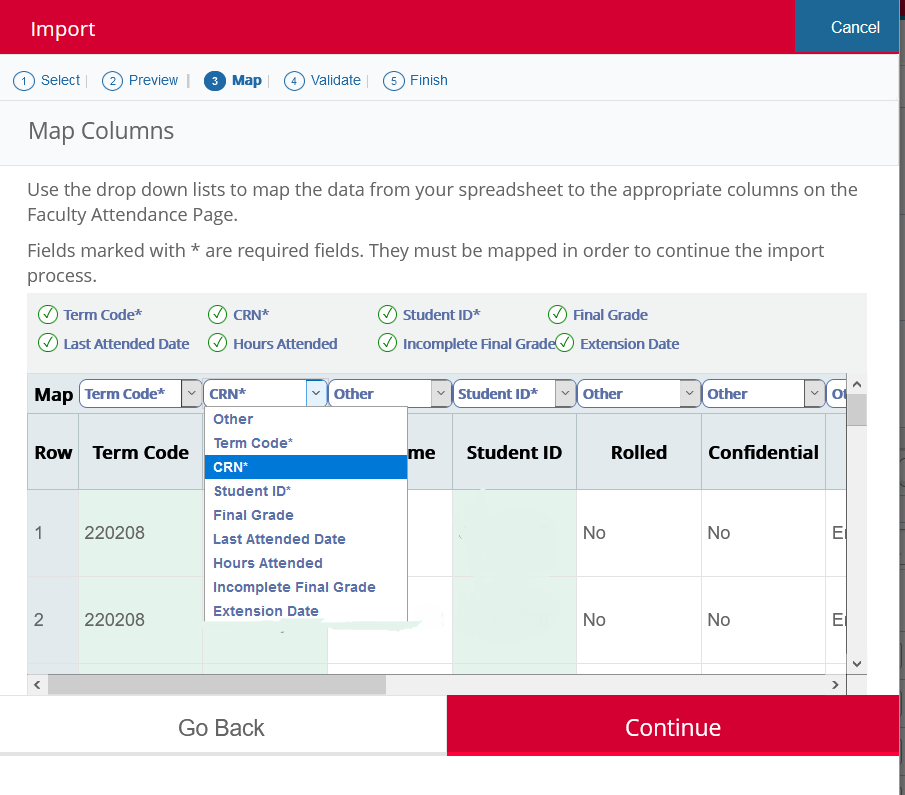 |
Step 4: Validate import.
The validation window will report to you the results of the matches to your roster. Read the information on this window carefully. In this window, you see the number of records imported, number of records with errors, and the number of unchanged records. | 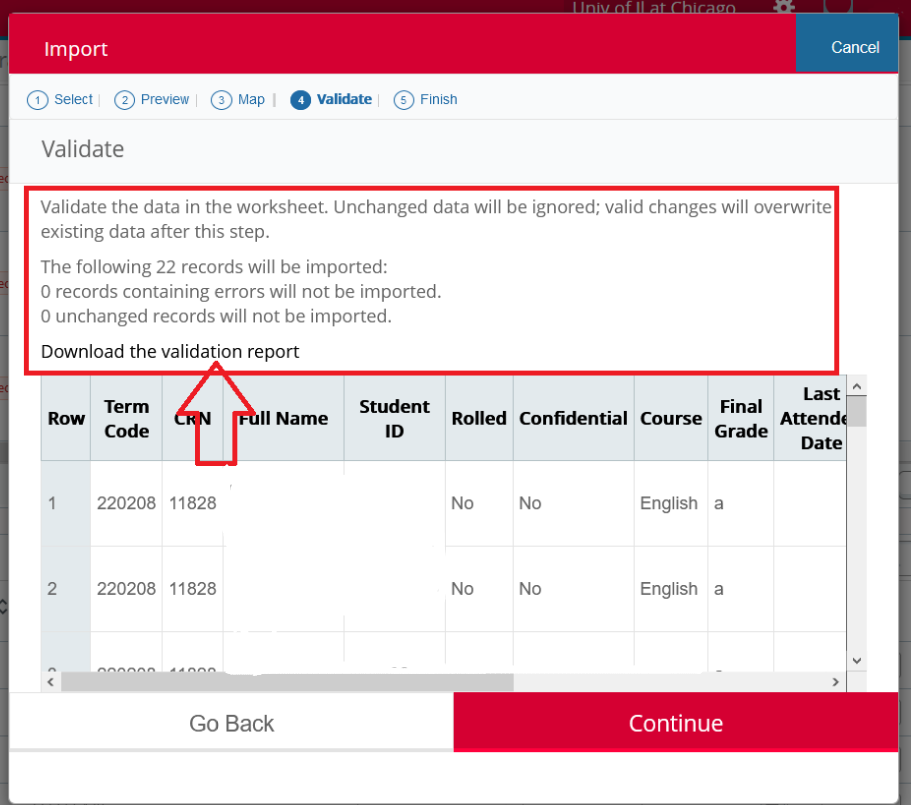 |
The Validation Report provides specific information for correcting grade entry errors.
| |
Step 5: FinishYour grades have been imported to Banner 9. |  |
|  |
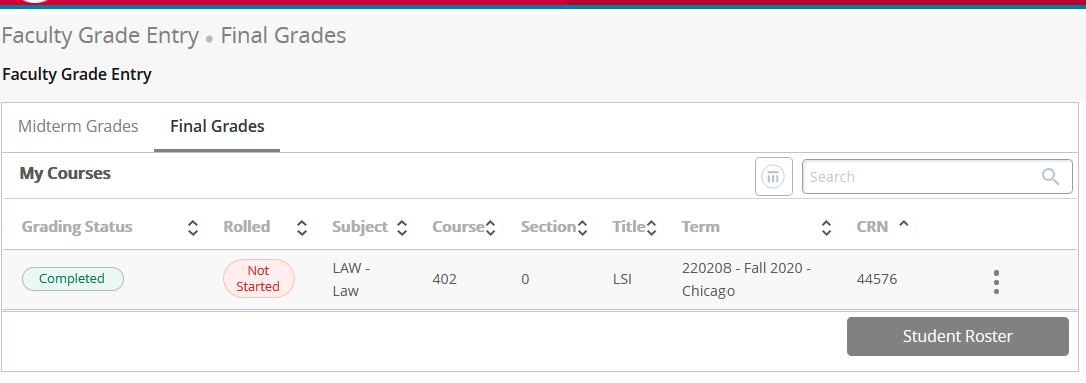
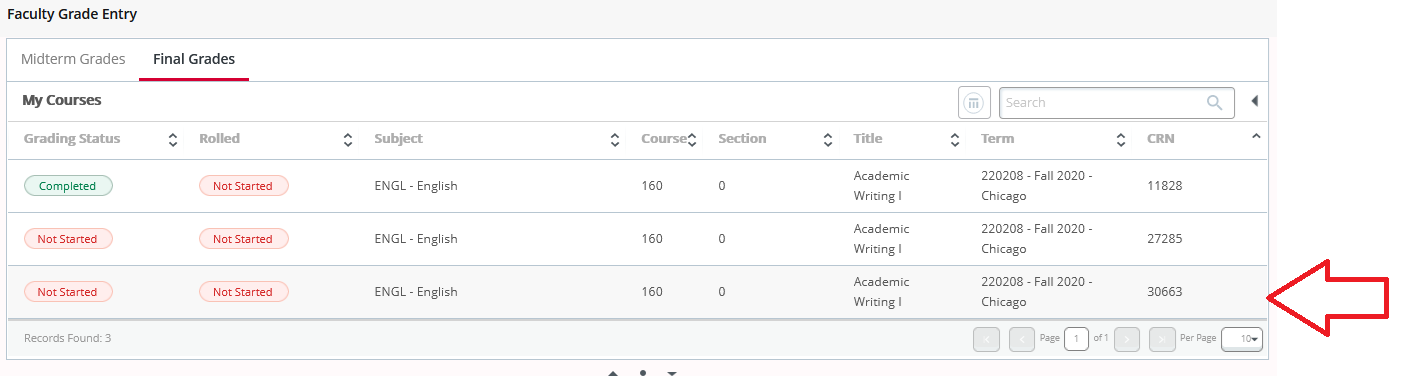
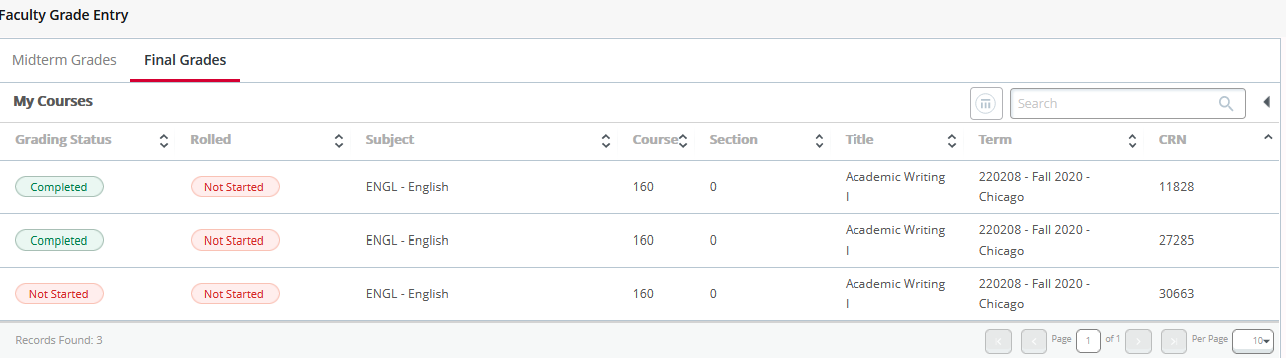
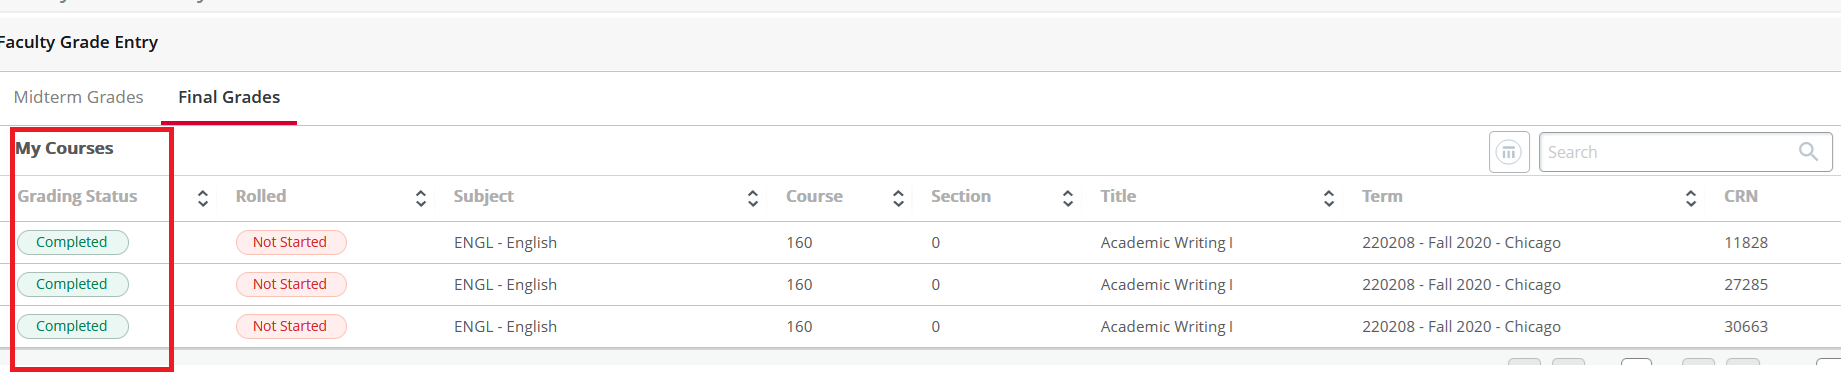
Note that the Grading Status icon for the course you submitted grades will have changed to Completed for the course you just submitted grades for if all of your submitted grades were imported correctly. If some of your grades did not import correctly, the Grading Status will display In Progress. |  |
6. Submitting Grades for Multiple CRN/Sections | |
|---|---|
Again, the file name created by the Export Wizard corresponds to the course roster for the highlighted CRN. Yet, the Export Wizard will name ALL spreadsheets downloads the same filename pattern irrespective of which CRN is chosen. If you have multiple sections, this can be confusing and you could overwrite your data. We suggest when you save the file, to add an underscore followed by the CRN you are working with. In this example, and if the CRN was 272275, something like: 220208_Law_402_0_Template_27275.xlsx |  |
|  |
|  |
|  |
 |
7. Troubleshooting: Wrong Roster and Reimporting | Click on image to enlarge |
|---|---|
Validation Report will show ALL the rows will have an error if you load by mistake the incorrect Roster for another section, The reason is that there will NOT be a MATCH for each Name and ID on the Roster. Look carefully at the Validation screen to confirm you are doing what you intend to do. | 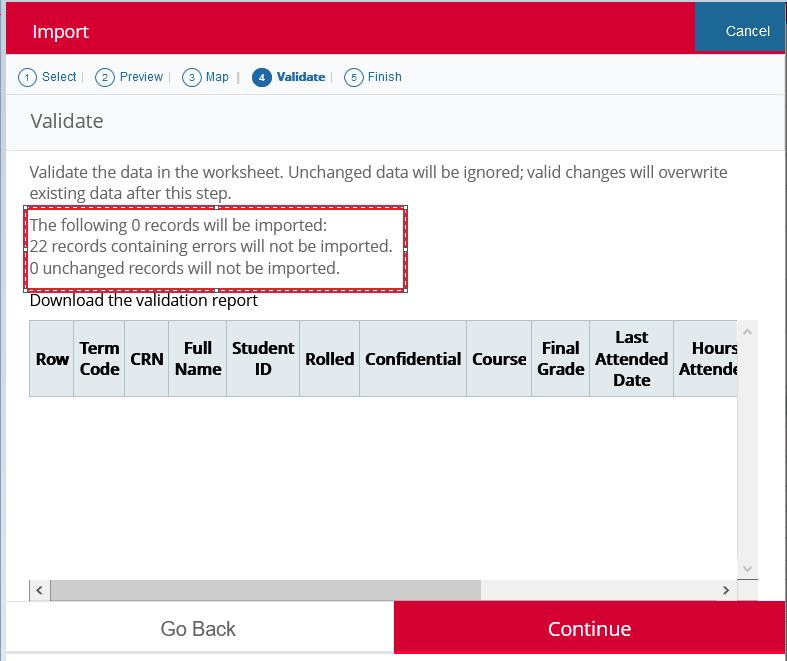 |
You can import the SAME template file multiple times using the same file name. This allows you make a grade correction for a student on the spreadsheet and re-import to FGE. (Note that grade corrections are only allowed via FGE up until the grading deadline).
IF you do not make ANY changes, then your Validation Report will show NO changes. IF you made changes, your Validation Report window will reflect the number of changes you have made and the Validation Report will show what was kept. | 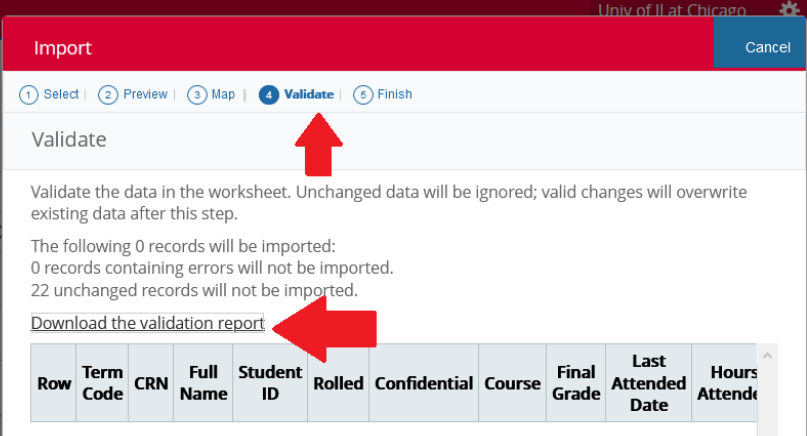 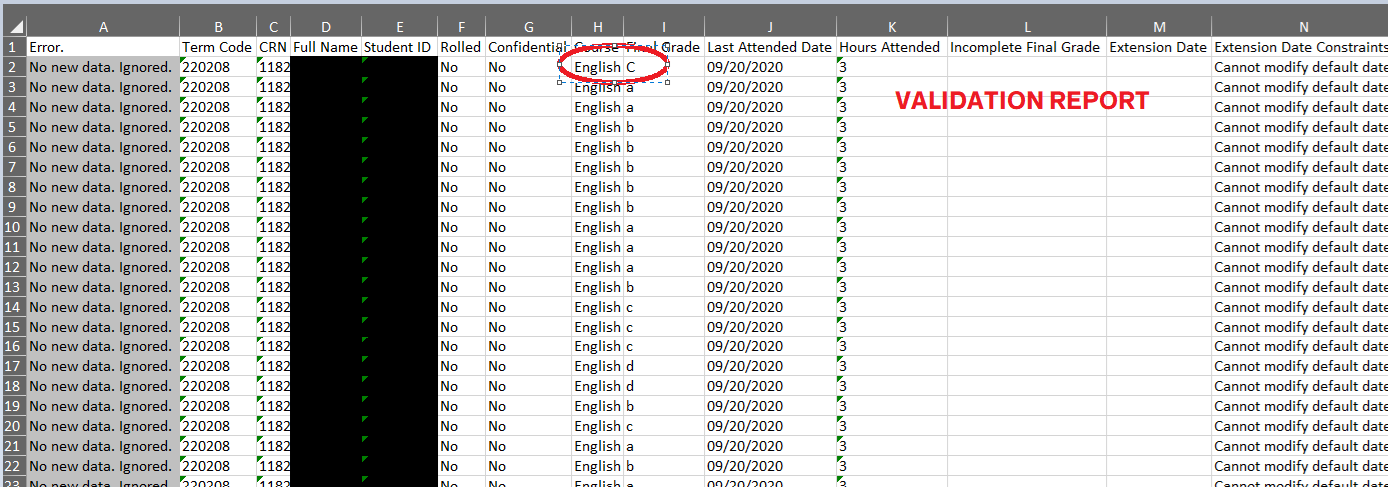 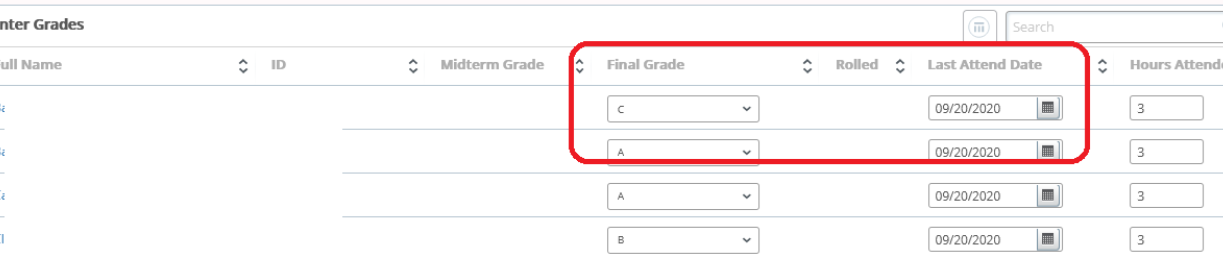 |
8. Importing from Grades from Blackboard | Click on image to enlarge |
|---|---|
|
|
Focus on Step 3 where you must map the columns to the Field Name expectations of Banner 9 FGE. Step 3: Look at the file exported from Blackboard. Choose if you want to copy and paste the grades to a FGE Template file OR alter your Blackboard export spreadsheet columns to the configuration of the FGE template. |  |
You can skip using the column headers by unchecking MY SPREADSHEET HAS HEADERS.
|  |